Thursday, December 27, 2012

Chicago Style Pizza

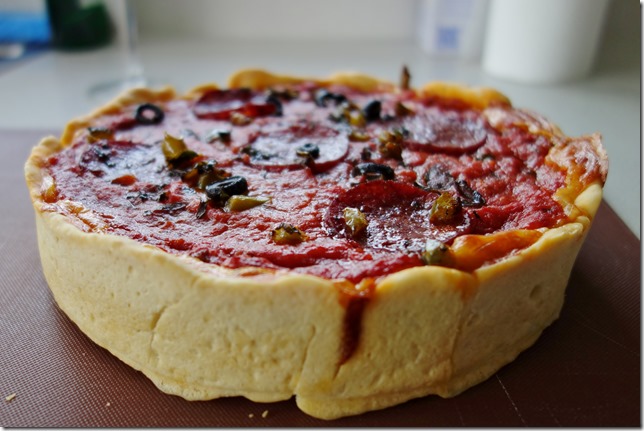
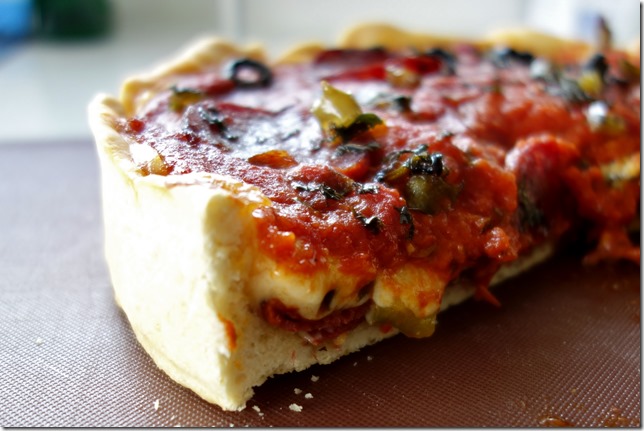
I had a hankering for home, and cooked up a Chicago deep-dish pizza: thin bread crust in a bowl shape, filled with the toppings on the bottom, layered mozzarella, and topped with tomato sauce.
DSC00319

DOUGH

I made a half-batch of Jaime Oliver’s recipe and divided the final product into thirds, using one and putting two in the freezer.
  • 500 g white bread flour or Tipo '00' flour, or 800g strong white bread flour or Tipo '00' flour, plus 200g finely ground semolina flour
  • 1/2 teaspoon fine sea salt
  • One 7 g dried yeast sachet
  • 1/2 tablespoon sugar
  • 2 tablespoons extra virgin olive oil
  • 325 ml lukewarm water
Mix yeast, sugar and oil in tepid water; wait until bubbly. Sift dry ingredients together and then combine with yeast mixture. Knead until springy and dough passes the windowpane test. Let rise in floured bowl for 1hr; knock down and divide, freezing unused portions. If not using immediately, cover in cling wrap and refrigerate.

SAUCE

While the dough is rising, prepare your sauce and fillings:
  • One 14oz can diced tomatoes
  • 1 tablespoon olive oil
  • ~30 small basil leaves, chopped
  • 1 clove garlic
  • 1 teaspoon of Sriracha sauce
  • Salt and pepper to taste (a few turns of each grinder)
Heat oil and press garlic into it; sauté until fragrant and golden. Add remaining ingredients; simmer over medium heat about one hour until wateriness is gone, big tomato chunks have cooked down, and sauce is thick, stirring occasionally.

FILLING PREP

This one is of course up to you.
  • 250g pepperoni, sliced (I used pepperilli, a chilli-pepper variant)
  • Handful of diced green bell pepper/capsicum
  • Small handful of sliced black olives
  • 250g mozzarella, sliced or shredded
Pre-cook the pepperoni in a pan (as if you were frying bacon) until it begins to crisp up (it won’t get crispy buried in the middle of the pizza, and also all that fat can be overwhelming in the middle of the pie). Sauté capsicum as well to eliminate most of its moisture.

BRING IT TOGETHER

Brush olive oil into a 9-inch spring-form pan, make a bowl shape of crust about 1” / 2.5cm deep. Pre-bake in a 170°C/325°F oven until beginning to cook through but still quite white, about 10 minutes (cooked enough that it can hold the ingredients, but not so much that it will burn in the following hour of cooking).
Fill with a layer of pepperoni on bottom; sprinkle on capsicum and olives. Layer on plenty of cheese, about 1/4” or 1/2 cm thick. Top with tomato sauce.
Bake uncovered for about 1 hour at 170°C or until crust golden and cheese melted.
DSC00320

Friday, September 28, 2012

Gluten Free Brownies

This recipe is from Martha Stewart. I’ve only adapted the ingredient list to be by weight since I don’t have dry measuring cups, and to use a double boiler, since I don’t have a microwave.

Ingredients

  • 85g (6 tablespoons) unsalted butter, cut into pieces, plus more for pan
  • 43g (1/3 cup) cornstarch (spooned and leveled)
  • 22g (1/4 cup) unsweetened cocoa powder
  • 1/2 teaspoon ground cinnamon
  • 1/2 teaspoon fine salt
  • 340g (12 ounces) semisweet chocolate chips
  • 150g (3/4 cup) sugar
  • 1 teaspoon pure vanilla extract
  • 3 large eggs
  • 100g (1 cup) chopped toasted pecan

Method

  1. Preheat conventional oven to 175°C / 350°F degrees. Lightly butter an 8-inch square baking pan and line with parchment paper, leaving a 2-inch overhang on all sides. Whisk together cornstarch, cocoa, cinnamon, and salt. In a double-boiler, melt chocolate chips and butter, stirring regularly. In a large microwave-safe bowl, microwave butter and chocolate in 30-second increments, stirring each time, until melted and smooth, about 2 minutes. Stir in sugar and vanilla. Stir in eggs, one at a time, until combined. Add cornstarch mixture and stir vigorously until mixture is smooth and begins to pull away from side of bowl, about 2 minutes. Stir in pecans.

  2. Pour batter into pan and smooth top. Bake until a toothpick inserted in center comes out with a few moist crumbs attached, about 35 minutes, rotating pan halfway through. Let cool completely in pan on a wire rack. Using paper overhang, lift cake out of pan and cut into 16 squares.

Via Martha Stewart.

Saturday, August 18, 2012

Brioche French Toast

I went overboard with brunch today: a small loaf of brioche made into a baked French toast, some bacon and papaya. Not pictured, the fourth slice of toast that I ate while waiting for the bacon to finish. Pro tip: if your butter is cold, grate it as you would cheese to make it spreadable.

Monday, July 30, 2012

Exercise Schedule

I’ve been sticking to a pretty good 4X/week exercise schedule lately that I really enjoy.

1 - Push:

  • Squats
  • Bench

2 - Pull:

  • Deadlifts
  • Chin ups
  • Bent over row

3 - Olympic:

  • Clean & Jerk
  • Snatches

4 - Cardio:

  • Swim

I usually do my squat and DL days after work, with the Olympic lifts and swimming on Saturday & Sunday.

It’s a pretty achievable schedule; no day takes more than 30 or 45 minutes. That means there’s enough time to exercise, cook, eat & clean the kitchen even after the weeknight lifts.

Fat Free

imageSometimes I marvel at the creativity of the modern CPG food marketers. Take this nugget from Hershey’s. Virtually Fat Free! Always has been! The skinny cows are dancing with joy!

Never mind that the product is essentially pure sugar.

Which begs the question: which is worse for you? Fat’s been demonized in our generation, but should it be? Obviously I have opinions on the matter.

I encourage you to, too. Don’t blindly believe the marketing, don’t trust what you were taught a decade or two ago about “healthy whole grains” and “artery-clogging saturated fat.”

Look deeper, build your own understanding of modern research, and most importantly, experiment. Go on a “sugar vacation” or a “gluten vacation,” give it a month. Listen to your body. Do you feel any different? Look any different? Sleep any different? You might be surprised at what you learn along the way.

Sunday, June 3, 2012

Cheesecake

Crust is 110 g almond meal, 1 egg, ~2T butter, pre baked in 200°C forced fan for 10 min (looked like a puffy cookie when I pulled it, could have gone a little longer).

Filling is the bottom half of Zeb's recipe [pdf]. 750 g Phillies original cheesecake, 3 eggs, 210g sugar, 1.5t each vanilla and almond extract. I rested the mixing bowl in hot water to help melt the cheese to make my hand-mixing easier. Baked for nearly and hour at 160°C conventional.

Saturday, May 26, 2012

Goals

A friend said to me the other day, “I want to be ripped.” As I turned that statement through my mind, it occurred to me that it’s flawed. The goal shouldn’t be to be ripped, it should be to enjoy being active and to enjoy cooking. Once you excel at those two things, becoming “ripped” is an effortless consequence.

The first time I really got into good shape was training for the 2008 Chicago Triathlon, when two colleagues of mine goaded me into signing up a full ten months in advance. As the race neared, we kept doing active things together: we went to Lake Michigan to go swim, we’d take our bicycles on fifty and 100-mile rides on weekends. Every morning at work we’d ask each other what our workout was the day before. After our workouts we’d have a drink and a laugh.

Being fit was social; being social was fun. That made being fit easy. And once I got used to being fit and ingrained some good habits, staying fit remained easy. I learned to enjoy the workout by myself, even without the social validation: sore from a good workout felt good, feeling tired from a good workout was something I would look forward to.

Now, roughly four years since, I’ve maintained those positive attitudes and brought into the fold a similar passion for what I eat. The result is that I’m happy with my shape and overall level of fitness.

Adjust your goals: make the journey its own reward and the destination suddenly appears.

Saturday, April 21, 2012

Eggs and Sugar

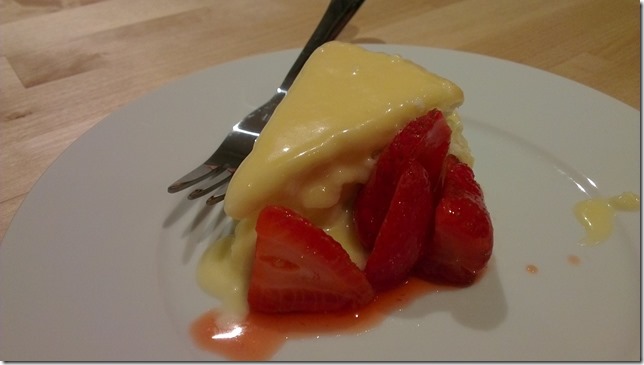
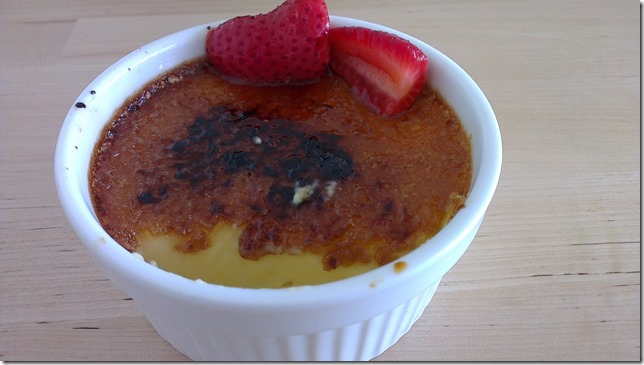
How many ways can you combine eggs and sugar? I made an angel food cake this weekend, which called for six egg whites. My grandma’s glaze for it called for 2 yolks…what to do with the rest? Crème brûlée.


Angel food cake: egg whites, sugar, flour.
Angel food glaze: powdered sugar, butter and water.


Crème brûlée: egg yolks, sugar and cream.

http://www.taste.com.au/recipes/25288/vanilla+bean+creme+brulee Though I used 1t vanilla extract instead of the bean stuff, and only made a half.

http://www.taste.com.au/recipes/10694/angel+food+cake+with+poached+strawberries I used tartaric acid and not cream of tartar; apparently they’re different but I only saw the former at the store.

Glaze for the cake:

  • 3-4 Tablespoons butter or marg.
  • 3 Cups powdered sugar (sifted)
  • 2 egg yolks
  • 1 1/2 teaspoons vanilla
  • 3 Tablespoons milk.

I used water and not milk, seemed fine. Didn’t need even half of it though for the small 20cm cake.

Monday, April 16, 2012

Meat Internal Doneness Temperatures

This is really just a reference for me, my “preferred” temps as I switch my meat thermometer from F to C.
Meat °F °C Doneness
Beef & Lamb 135 57.2 Red centre
Salmon/Trout 135 57.2 Just tipping from translucent to opaque
Chicken Breast 160 71.1 Especially juicy when brined
Chicken Dark Meat 170 76.6
Pork 140 60 Juicy!
Thermopen manual – highly recommended thermometer btw. To switch a Thermapen from C to F, toggle switch 1:
image

Saturday, March 31, 2012

Olives

I recently met a very sweet older Israeli woman living here in Melbourne named Ruth; I noticed in her kitchen a jar of what looked like olives. I asked her what was going on: they were in fact olives and she was curing them. Growing up in the Midwestern United States where nary an olive tree may be found, I did a double take and insisted that she elaborate. What I learned set me off on what is now the start of a multi-month journey of curing my own olives.

image
Ruth’s Olives

Today I got my hair cut by an older Greek man named Peter—armed with what Ruth taught me, I asked him if he cured his own olives. “Of course,” he told me, “I have an olive tree in my yard and I cure them all to last me for the year. They’re in season now, you know.” I did know, thanks to Ruth.

And of course he cured his own olives. Where have I been!

Here I was suddenly confronted with the fact that it wasn’t just Ruth, but generations of families that have been curing olives and passing on their methods by oral tradition. Again I insisted that Peter elaborate on the method—now that I lived somewhere with olive trees, I wanted to give this a try. Of course, a week ago, I had no idea that there were olive trees here, let alone that you had to do “stuff” to an olive to make it edible!

Raw olives off the tree are so bitter as to be impossible to eat—the only thing I can compare it to is a crabapple, except much, much worse. From my research I’ve found that there are three general ways to cure olives: in fresh water, in brine, and in a lye solution. They all serve the purpose of drawing out the bitter compounds (oleuropein) and preserving the olives so that they can be stored for a year or so without refrigeration.

Ruth and Peter’s methods were very similar: slice into each olive against the pit (to speed the drawing out of bitterness), cure in fresh water for 5 days to a week, changing the water daily. At that point switch to a brine (Ruth said 1T per cup of water; Peter said to put an egg in water—it will sink—and add salt until it floats with “the size of a 20¢ piece” above water). Let it sit for a month and taste one; they’ll be ready in another month. Ruth added peppers, onion, lemon juice and garlic to her brine. Peter suggested adding vinegar, and then pulling out small batches and marinating individually.

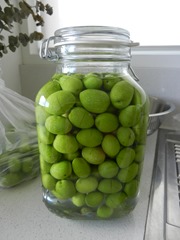
I read a number of recipes online and decided on two batches: one following the freshwater+brine guidelines of Ruth and Peter, a second following a lye-cure. My family grew up with Graber Olives as a special treat for big family/holiday dinners (owing to my grandpa growing up in the same city as Graber). From what I’ve read lye cured olives will have a buttery texture that seems to describe Graber’s nearly perfectly.

Last week I bought supplies but couldn’t find olives (it was a Sunday and the markets are slow on Sundays); today (Saturday) I found olives without issue at South Melbourne Market and at a fine price of $2.99/kg…I came home with 2.5kg (about 5.5lbs).
DSCN2001
My first water+brine olives, with the to-be-lye cured waiting in the bag beside.

Two batches are now in jars. At the end of this week I should have an indication of whether or not the lye worked and if I’m going to be buying another jar and more olives next Saturday. Stay tuned!
Friday, March 23, 2012

Cauliflower

After roasting a chicken, I tossed cauliflower in the drippings and then roasted it for 20 or 30 minutes at 180C in a forced fan oven. Topped with bleu cheese and bacon. Very delicious! And it uses up the fat that might otherwise be waste.

Saturday, January 28, 2012

Breaking in a new kitchen

Blanched and shocked green beans tossed in lemon juice and olive oil; lightly salted, cherry tomatoes mixed in, and chilled; garnished with cilantro/coriander leaves. Cilantro + green beans = win.

Salmon broiled to 135F internal, turned once, topped with lemon, salt and pepper. Crispy salmon skin = win.

Sunday, January 8, 2012

Christmas Ham

WP_000528WP_000530

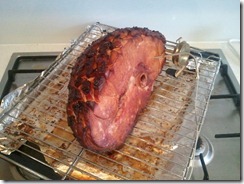
The secret here was a ridiculously amazing piece of meat from Hagen’s. A simple glaze and cooking to an internal 140ºF/60ºC was all it needed. The skin was also roasted separately and served as an appetizer (with nothing done to it, no salt or extra fat needed, just peeled and cut into strips). Roasted at maybe 150ºC in a forced fan oven, basted every 30 minutes, glaze added for the final 30 minutes. Add water to the roasting pan to prevent scorching the drippings. The fat was impossibly silky, melt-in-your-mouth perfection.

Glaze:

  • Brown sugar
  • Maple syrup
  • Minced & mashed, pitted fresh cherries
  • Clove
  • Nutmeg
  • Cayenne

Mostly brown sugar, enough fruit and maple to make a very thick syrup. You want it thick enough that it sticks in the scorings on the ham. Go easy on those spices, they’re potent.

Tuesday, January 3, 2012

What you know is wrong - Saturated Fat is Good for you

imageOne of my diet tenets is that the closer your food is to nature, the better is is for you. Almost everything I eat is meat and produce—very little of what I eat has a label or packaging.
The same appears to be true about dietary fats. Hydrogenation, the chemical process that creates oils that are spreadable at room temperature (e.g., margarine), creates trans fats and saturated fats. The former is horrible for you, the latter may be good for you; lazy science has lumped them together in our collective consciousness.
I believe that fats out of nature (animal fats and unadulterated vegetable oils) are good for you.
Here’s a well-cited article on saturated fats http://www.huffingtonpost.com/dr-mercola/coconut-oil-benefits_b_821453.html:
You've no doubt noticed that for about the last 60 years, the majority of health care officials and the media have been telling you saturated fats are bad for your health and lead to a host of negative consequences, including high cholesterol, obesity, heart disease and Alzheimer's disease.
Meanwhile during this same 60 years, the American levels of heart disease, obesity, elevated serum cholesterol and Alzheimer's have skyrocketed.
Did you know that multiple studies on Pacific Island populations who get 30-60 percent of their total caloric intake from fully saturated coconut oil have all shown nearly non-existent rates of cardiovascular disease?
The fact is, all saturated fats are not created equal.


Here’s another well-cited paper, Saturated Fat is Good For You http://www.spacedoc.com/saturated_fat_is_good_for_you_1 (quote from part 2—debunking the “fat is bad for you” study that is still oft-cited):
Ask any scientist in this area to list the names of those who have created the diet-heart idea and nine out of ten probably put the name Ancel Keys on the top.
One of his first contributions in this area of science was a paper from 1953 where he stated that heart disease was caused by too much fat in the diet. As an argument he used a diagram showing the association between fat consumption and heart mortality in six countries. It looked very convincing, because all observations were in accord.
On top were  the figures from the US; at the bottom those from Japan. In the US people ate five times more fat than in Japan, and heart mortality was fifteen times higher. The data from the other countries lay all between forming a beautiful curve starting in the lower left corner and ending in the upper right.
But Keys' paper was a fake. At that time information was available from twenty-two countries. This is what two American scientists revealed four years later. Their conclusion was clear: "The apparent association is greatly reduced when tested on all countries for which data are available instead of the six countries used by another investigator."
And finally, some anecdote. When you go on a diet, when you eat fewer calories than you burn, your body will be forced to digest fat—that’s why we usually diet, because we want to get lean. If you lose 2.2lbs/1kg of fat per week (a reasonably healthy and sustainable rate), you’re burning 9000 calories of fat per week (fat has 9 cal per gram), or 1285 calories of fat per day. In other words, half of your daily calories can come from burning saturated animal fat—the blubber on your belly and ass.
If saturated fat is so bad for us, why would our bodies have evolved to use it as an reliable source of long-term energy storage? If our evolutionary ancestors were in a period of famine and they had to use up their fat stores, surely those who couldn’t handle the fat would have died from saturated-fat-induced heart disease (if the famine didn’t kill them first). The fact is, we’re here because those who could successfully process the fat survived. I reckon our bodies can handle fat better than we’ve been led to believe.
Happy eating! Enjoy that coconut, avocado, and grass-fed steak.


Monday, January 2, 2012

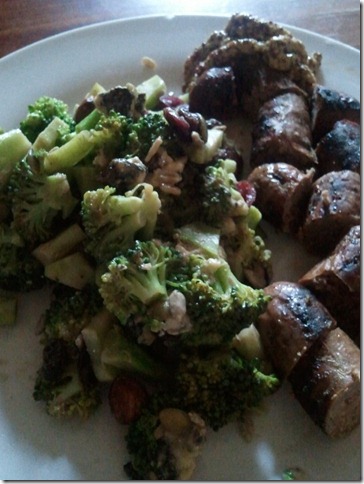
Quick Broccoli Salad

Just a template, but here you go.

WP_000566

  1. Cut broccoli into small pieces. Chop up thin/medium stems. For the thick stem, remove and discard the fibrous outer skin and chop up the center.
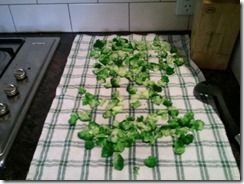
  2. Blanch in boiling salted water for 60 seconds—no more—just long enough to remove some bitterness and soften it up.
  3. Let air dry for five minutes or so
    WP_000562
  4. Toss with whatever goodies you have on hand: above used bleu cheese, some fruit/nut trail mix and vinegar and oil.
  5. Add a dash of salt (unless your mix-ins were already salty)
  6. Refrigerate for a couple hours.

Method adapted via Jamie Oliver. Shown plated above with leftover refrigerated sausages.